Review - Kyosho Fazer Mk2 1970 Dodge Charger Supercharged RC Car
Please play the drum roll. Introducing the Kyosho Supercharged ReadySet for the 1970 Dodge Charger. With motorized headlamp covers, brushless electronics, and other features, this 1/10 scale on-road remote-control automobile has a classic American muscle car body. After removing it from the box, we drove it and checked its speed.
Unboxing the Kyosho 1970 Dodge Charger RC Car
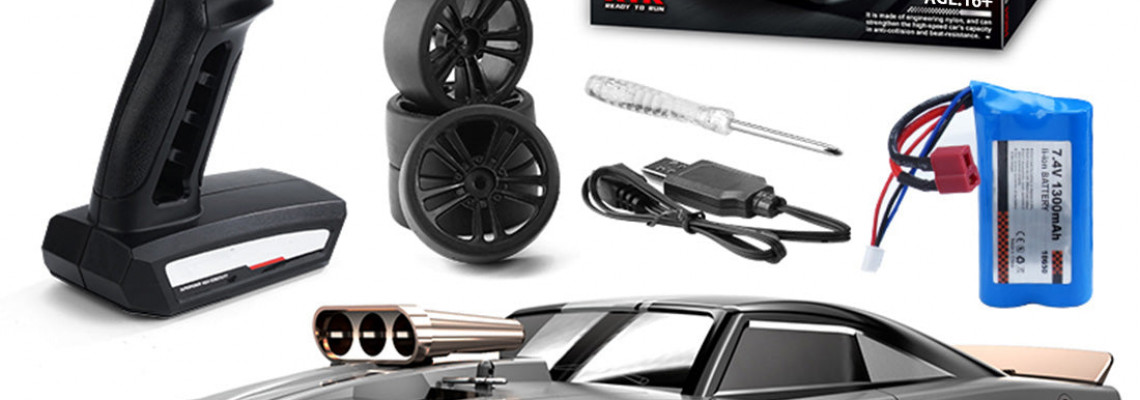
With its wholly built, programmed electronics and a fully painted and decorated exterior, the Dodge Charger remote control car is ready to go right out of the box. Batteries are not included, though; a two-cell LiPo is needed, and the transmitter needs four AA batteries.
Since Kyosho has been producing scale-representative on-road vehicles in a variety of body types for a number of years, and they all utilize the same Mk2 chassis base, this new vehicle is not technically the first of its sort.
What makes this Mk2 different?
For the first time, Kyosho has fitted this vehicle with high-performance brushless electronics, which are significantly more potent than the brushed electronics found in the previous cars.
Because of this, this on-roader is more expensive than the previous variants, but it will be faster and have more features.
Let's Check Out the Vintage Kyosho 1970 Dodge Charger Body
The body of the 1970 Dodge Charger is fantastic and perfect for both RC enthusiasts and automobile collectors.
Fans of the Dodge brand are aware that the second-generation body style was offered until 1970. Its distinctive characteristics, including the fastback roofline, split grille, hidden headlamps, and racing fuel cap, positioned it as a high-end sports vehicle.
Even after more than half a century, the RC car version is still potent and closely resembles the original. The body shell is composed of flexible Lexan, and decals or molded plastic are used to add accessories and embellishments.
One of the most significant features is the full-length squared-off front grille, which has vertical teeth. It was dubbed the Electric Shaver, so we can see where that name came from. Unfortunately, until you add a sub-micro servo—which we'll discuss later—the headlight covers are stuck in their open position and won't work.
The Dodge lip, blinkers, and branding are decalized. The headlights are functioning lenses made of hard plastic that can have two 5mm LEDs added to each side. Conveniently, Kyosho provides LED light kits in two or four light strings in a few different combinations, including white and red color options.
The supercharged air compressor is located higher on the scale body. It is a chrome-challenging plastic component attached to the chassis for added strength that looks amazing. The butterfly valves are manually opened and closed. Hard, plastic-molded, inoperable windshield wipers behind the supercharger are also present.
Tinted decals that serve as black window trim surround the windshield and other windows. The side mirrors are made of molded hard plastic with tiny reflecting decals, while the door locks and handles are decals. Toward the back, More Dodge Charger-branded decals, red racing stripes, and a hard plastic molded racing-style fuel cap can be found.
The button head screws holding the rear end to the Lexan body are visible. With extended taillights that use 5mm LEDs and a strong plastic molded light portion, it is sturdy. Additionally, a total of six LEDs can be installed in the back, three on each side. This body can accommodate ten LEDs, making it the perfect scale body when combined with the front-end LED options.
So, how fast is the brushless 1970 Dodge Charger?
To test this, we took out our GPS speed meter, charged a two-cell LiPo battery, and started making passes. After a few minutes of back-and-forth, we reached a maximum speed of 37 mph. The car had a lot of torque on the bottom end and was geared conservatively.
What's inside the Dodge Charger
The Brainz 1060 amp ESC is included, and it works with both two and three-cell LiPo batteries. However, it has an updated center pinion gear to manage that brushless system. The motor is a 4000kv TORX 10E four-pole, and it is only compatible with two-cell LiPo.
The optional red aluminum center driveshaft is another improvement on this vehicle. Typically offered separately, that hop-up is included to manage the powerful brushless system.
Our first impressions after driving the Kyosho Dodge Charger
The first opportunity we had to drive the automobile and test it out was during our speed runs. When you first steer, the steering is erratic. The car is really torquey, and we wonder whether the extra weight from the blower being up top is the reason it has a lot more initial steering than some of the older FAZERs.
When the battery was installed, we were able to reach our driving weight and riding height; however, the front did slant somewhat downward. Putting some of these clips on the shocks is a simple way to level things out. The car can be raised by adding clips to the front or lowered by removing ones from the back. Tuning can be quickly and conveniently experimented with with these adjustments. The ultimate goal is to make the car easy and comfortable to drive.
Kyosho 1970 Dodge Charger RC Car Upgrades
We have a lot of drift carpet tires because some of you may have seen the Drifter series we've been performing lately. Although the Dodge Charger isn't made to be an actual drift car, it can power slide and go sideways with the correct tires. The steering angles are comparatively shallow for control drifting, and it might not be taking home any trophies at the local drift competition, but it's still enjoyable. It's just another aspect of the car's potential.
Another improvement to improve drifting is the optional Kyosho KRG-331 receiver, which has an integrated steering gyro with adjustable gain. In loose situations, these steering gyros can be very helpful when getting sideways or when you want a little more stability.
The MST GT white wheelset looks really impressive, even though they might not be appropriate for the vehicle's age. We really like the sporty beach cruiser attitude they offer. That appearance fits very nicely with the Dodge Charger's last aspect of scale realism.
Adding a sub-micro servo beneath the supercharger to operate the electronic headlight covers is one of the best enhancements you can make to the charger. The transmitter's third channel switch can then be used to open and close them. The user manual explains the comparatively easy setup process.
Here is how we added the electronic headlight feature to our Dodge Charger.
We started by taking the handbook and the bag of spare parts that came with the vehicle. To enable the flaps to move freely, we first took off the locking screws. In order for the flaps to move together, we first screwed the provided connecting post to each flap. Third, a control arm was attached to the connecting post and secured with a body clip. Fourth, we unclipped the rear and pulled straight up after removing the lower body clips from the body posts to remove the supercharger from the chassis.
After that, we made sure the Eco Power 827 servo fit correctly before installing it. Prior to mounting, the servo should be adequately powered on, and the spline position should be aligned before the control arm is installed. We turned on the transmitter and the vehicle after plugging the new servo into channel three on our receiver with the same polarity as the other connectors.
According to your user manual, the control arm should be installed in the above direction with the transmitter's third channel button at the top setting. It's essential to keep in mind that the provided horn's spline count is unknown, and it didn't fit snugly with our sub-micro servo. In order to fix this, we cut out small plastic squares and attached them to the spline beneath the horn. Because it will strip out, this method is ineffective in applications with high loads. However, it's OK for this use.) When everything is squished together, the fit becomes much tighter.
We can mount the servo on the supercharger base and reinstall the base to the chassis once the control arm is mounted on the servo. An O-ring and a screw are used to fasten the final control arm to the body's existing arm. To fine-tune the movement, it offers some length adjustment.
After installation, mounting the body requires a slightly different process because the headlamp covers must be connected first. We discovered that the most effective way to increase accessibility to the control arm was to push down on the front of the body. Then, using needle-nose pliers, we connected the arm on the body to the arm in the car using a body clip. We then turned on our charger, secured the body as usual, and had a great time.
