How to Install Capo CUB1
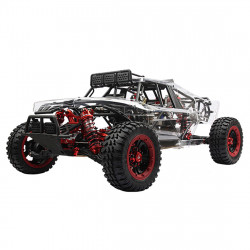
We can only focus on some parts of experiencing a new car. Achieving perfection can be difficult, especially with KIT. This can be challenging for beginners.
However, we'll employ a rapid and practical method to frequently share the loading and modification experience with everyone. Enhance one another.
When assembling CUB1, consider the following safety measures and potential issues. When loading the automobile, please make sure to check thoroughly. Regards!
1. How do you open the box correctly?
Using one hand, pinch the black box cover's edge; if not, ask someone else to help. Using the other hand, press the "matchbox" to force it out straight.
2. Where is the manual?
The instruction manual is next to the shock absorber on the first layer of the black sponge tray. USB flash drive made of silver metal.
3. How to find the parts corresponding to the manual.
This guidebook uses a three-color system to help players easily match pieces while building for the first time. You may also look at the image down below.
By looking at the colour and name shown in the manual interface's lower right corner, you may easily locate the part.
4. Suggestions for electronic equipment
The small-scale model is less rich than the third-party electrical equipment of the previous brand ratio of 1/10. Matching electrical equipment is available to service the CUB model series. We have already completed design data matching with participating manufacturers and third-party brands. Simultaneously, numerous manufacturers have offered electrical equipment specifically designed for CAPOCUB.
Recommended add-ons:
Servo×2: PowerHD CAPOCUB special. Model: 1810MG
Most 9g size steering gears are generally used. High-pressure steering gears are not recommended without the intervention of UBEC.
Motor: MADGEAR CAPOCUB custom set. Model: 22000
ESC: MADGEAR CAPOCUB custom set. Model: ESC02
Battery: COBRA CAPOCUB special. Model: CBCC01
General lithium battery parameters: white balanced female charging head, 2S 7.4V parameters.
The battery compartment can hold the battery volume 63×32×17mm
Remote control: 2.4g gun controller with 4 channels and above.
The receiver size is smaller than 46×22×17.5mm
5. Vehicle assembly skills
Q1: Is it recommended to apply lubricating oil to brass gears?
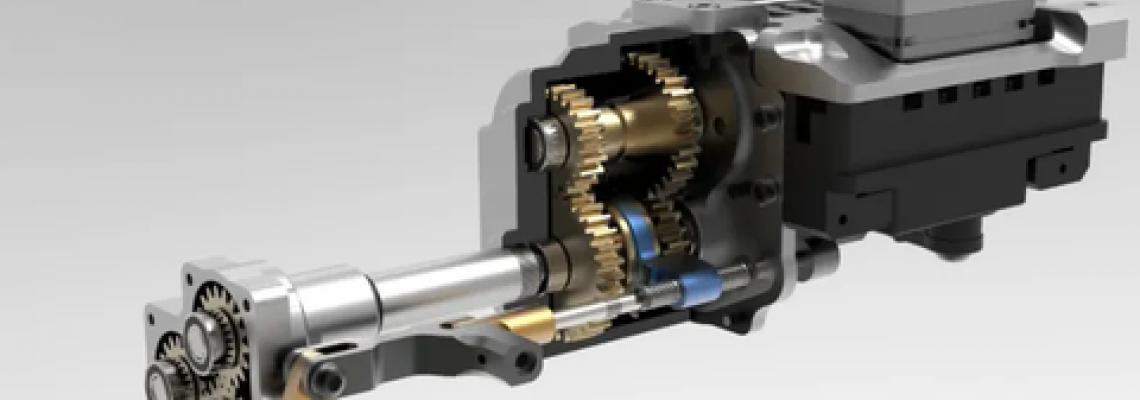
A1: Because of the self-lubricating qualities of the copper substance, little oil is needed. In other words, a thin covering to stop the substance from oxidising. The gear pliers could slip if there is too much grease on them. All that's present are the gearboxes and axles, which require regular lubrication and maintenance.
Q2: How do you oil the shock absorber?
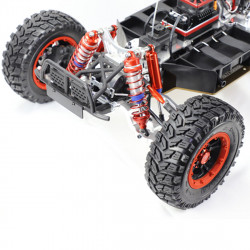
A2: It is a relatively modest ratio, the 18 ratio. O-rings are not ideal for shock absorbers because of processing limitations. It is impossible to create a negative pressure chamber with sufficient oil flow. CUB's shock absorber needs lubricating grease for springs, with extra grease added to improve damping.
Q3: Is the plastic ball head working hard?
A3: The new plastic ball head and stainless steel ball rotation space design are too tiny to lessen the looseness of the chassis. This also makes the shared ball head operate firmly at the front axle, which impacts the steering back towards the centre.
To keep the stainless steel ball running smoothly, it is recommended to loosen it, take it out, and put it back in several times. Another option is to use a bit of silicone oil. Water sanding is not advised.
Q4: Is the gear L-shaped connector tight after assembly?
A4: Because the screw hole's edge may have several tiny edges that are visible through the tapping. If the part feels too tight, you have two options.
You can either take it apart and shake it gently. Or you can clean the red-highlighted side wall with wet sandpaper. After tightening, a smooth state is attained.
Q5: During adjustment, the root problems are gear-shifting and holding the rudder, irregularities, and blocking.
A. The value of the servo's initial rudder amount is very high. Please turn on the power to modify the rudder amount below 30%.
B. The servo's position is not centred; therefore, the remote controller's fine adjustment will be off in the future. Before assembly, please turn on the power to shift the steering gear back to neutral.
C. The gear lever's golden cylinder adjustment diagram is crucial. There are variations across various automobiles since the screw fixation lacks an absolute position. The outcome of self-adjustment will win out.
6. Problems and matters of paint surface:
A. To protect the paint surface as the primer, a matte gun-color paint surface is applied on the car shell. The fine static artwork is different from the intricacies. However, it can also accommodate RC entry players' needs. Spraying metallic paint is an option. Or a more advanced paint procedure to alter the hue. Take note of the paint's thickness to avoid hiding too many features.
B. The primer has considerable thickness even though it is thin. During installation, inserting small nails into plastic parts or the tail plate may affect the parts in place. This is because the paint surface thickness in the hole could cause some obstruction. It is sufficient to sand the patent leather appropriately.
7. Axle disassembly and maintenance
This axle is not factory-tuned; it is added beforehand. For maintenance, please disassemble and oil it.
Low-strength screw glue, anti-vibration, and anti-tension are used to secure the screw. In addition to not guaranteeing tightness, forceful tightening can easily break the sliding teeth in the screw holes. Please focus more intently.
There are two loading techniques that you can use in total.
SERVICE TERMS
—Exterior of the parts
This product was shipped as a kit, requiring manual assembly and setup. Small scratches may appear on parts due to different production methods. However, these scratches do not affect the final result.
Each part is either CNC machined or molded separately. The after-sales service is only applicable for major defects. We appreciate your understanding and will continue to raise the bar on production techniques.
—Cast moulded parts
Certain metal components are cast moulded. Therefore, they might have a different surface quality than CNC machined parts. They might also have small dents and scratches, and after-sale support is not offered. It will be fine with quality if the part breaks.
—Human errors listed in the manual are not for after-sales service.
1. Inappropriate tools with excessive torque can cause parts to corrode by screw glue and break screws or thread.
2. Ignored the instructions, which resulted in worn-out or broken parts.
3. Keep the product in a tough environment to cause rust to build up on the parts.
4. Additional human error determined by the post-sale department.
To apply for after-sale service, please contact the dealer for additional details.
The manual's drawings are meant to serve as a guide and may differ from the actual parts.
